Felix Smart Manual
2. Front LED Light Bar Status - Color Status Guide
3. Devices
a. How to Setup a New Device
i. Manual Mode:
ii. Cycles:
iii. Timers:
iv. Events:
v. Toggling Modes:
d. Setting up Cycles
e. Setting up Timers
f. Setting up Events
g. Device Settings
4. Sensors
a. Interpreting a Sensor
b. Setting up a Sensor
c. Pinning Sensors
d. Sensor Alarms & Notifications
5. Notifications
a. How to use Notifications
b. Types of Notifications
6. Wi-Fi
a. Wi-Fi Connection Limitations
b. How to Clear Wi-Fi Settings & Connect to a New Wi-Fi Network
7. Settings & Upgrading Firmware
a. Felix Smart Controller Serial
b. Firmware Version and Updates
c. Front LED Light Bar Settings
d. Renaming a Felix Smart Controller
e. Deleting a Felix Smart Controller
1. Introduction & Initial Felix Setup

1. Front LED light bar
2. 8x power sockets
3. 6x USB 2.0 ports
4. Reset button
5. Back status LED
6. Power switch
7. Power fuse
8. Outlet connector
Welcome to the Felix Smart Family! This is a comprehensive guide on how to use and operate your Felix Smart controller. We recommend reading this introduction section fully before setting up your controller.
If you have not done so already, please carefully unpack and remove your controller unit from the box. Find the included power cable, plug it into the back of your controller, connect your controller to the wall socket, and flip the “power switch” to the ON (—) position.

Please give your controller 1-2 minutes to fully boot up. Much like a computer, your controller needs time to ready its systems. When the boot is complete, your front LED light bar will be solid white.

Download and install the Felix Smart application on your smartphone. The Felix Smart application can be found on the Google Play Store (for Android phones) and the App Store (for iPhones).


Note: The Felix Smart controller is only compatible with a 2.4 GHz WiFi signal and Dual-Band WiFi routers.
Note: Please ensure that you are close to your controller when setting up WiFi, and that your controller is not too far away from your WiFi router.
Once successfully connected to your WiFi and the Internet, your controller's front LED light bar will turn from a solid color to a light moving back and forth (indicating that you have an internet connection).

Congratulations, your Felix Smart controller is set up!
Optional step: Once your controller is set up, you may want to check and see if there are any new updates for it. Please click here to go to the Felix Smart Firmware upgrade guide (Sandwich menu ☰ > Options > Update to Firmware ____).

2. Front LED Light Bar Status - Color Status Guide
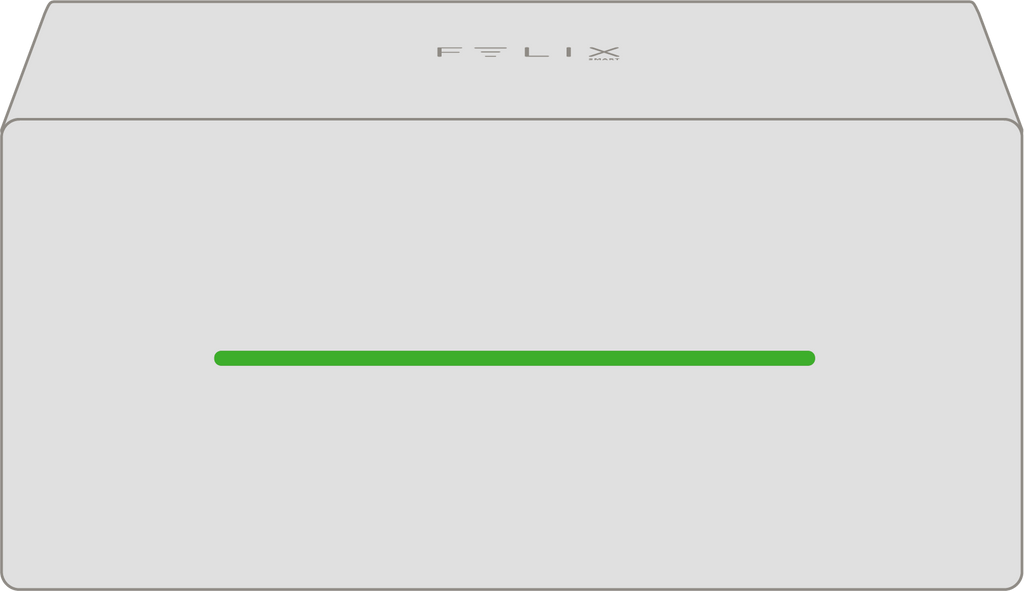
The Felix Smart controller's front LED light bar changes color and form depending on the status of the controller. Please use the color guide below to reference your controller's status:
- Moving Light - Internet connection OK/Normal status
- Solid Green - Booting Up or Lost Internet Connection
- Flashing White - WiFi Connected, but no Internet Access

- Solid White - Ready to Connect to WiFi

- Solid Blue - Camera Streaming

- Solid/Moving Purple - Firmware Upgrade in progress

- Solid Orange/Yellow - Reset Complete/Power Cycle needed

- Solid Red - Firmware or App Error (Contact Support)

3. Devices
a. How to setup a new Device
To set up any new device that is plugged into one of your 8 power sockets, tap on the arrow in the “Devices & Scenarios” section.

Here, you can see a list of all your devices, as well as a green “ + “ button at the top right of the screen. Press this “ + “ button to add a new device to your controller.

In this screen you can add details about your new device, such as the device name, the device type, as well as the device location. Device location refers to the socket location at the back of the controller where the device is plugged into. Once you have inputted this information, press "Save" to add the device.

Note: You can change the device name and type later by pressing the gear icon next to the device.
b. Device Scenarios
Once in a while, you may need to temporarily turn off certain devices in your ecosystem while you perform maintenance, or another task. In these cases, you can use the “Scenarios” function of your Felix Smart controller. This function will let you pick which devices you want to turn ON/OFF and for how long. This means you will never forget to turn your devices back on again!
How to create a Scenario: In the home screen of the Felix Smart application, tap on the arrow in the “Devices & Scenarios” section.

Next, tap on the “Scenarios” tab at the top. This will bring you into the Scenarios screen. Tap the green “ + “ sign at the top right of the screen to create a new Scenario.

Give your Scenario a name and select how long you want the Scenario to run when it is activated.
Under “Scenario Devices” you can decide the status of each device when the Scenario is active (ON, OFF, or Not affected). Select your desired status for each device, and when finished, tap “Save” at the top right.

After the Scenario has been saved, you can edit it by tapping the gear icon, or activate it by tapping the toggle button on the right.


Once active, your Scenario will begin counting down until completion.
Note: Scenarios are the highest priority item in your system and will override any other automations.

c. Device Modes & Toggling
Individual devices in a Felix Smart controller operate in different modes. These modes dictate the behaviour of the device. You can set the mode of the device depending on what automation goals you are trying to achieve for it. For a full explanation of how to setup different modes, please read the subsequent components of this section.
Manual mode:
Manual mode is the default mode of every device. When a device is in Manual mode, it is either always ON, or always OFF. The ON/OFF state of the device is dictated by the user. You can easily change the state of the device by tapping the toggle button to the right of the device. When you press the toggle button again, the device will restore its previous settings.
If you wish to stay in manual mode for long periods of time, you can press the toggle button in the "Device Settings" menu. The current state of any device will always be indicated underneath of the device's toggle button on the home screen.
Note: "State" refers to whether the device is ON or OFF.


Cycles:
For a guide on setting up a Cycle, please click here. A Cycle allows you to create a complex schedule for your device’s operation. With a Cycle, you can set a start time, end time, number of activation events, and even stagger your Cycle days using the Cycle Calendar. A Cycle is perfect for automations like cycling a fan for 2.5 minutes, 8 times per day. Or misting a terrarium for 10 seconds, once every hour of the day.

Timers:
For a guide on setting up a Timer, please click here. Timers let you create simple schedules for your device’s operation. With Timers, you can set a start and end time, and your device will turn ON at the start time, then OFF at the end time.

Events:
For a guide on setting up an Event, please click here. Events is a conditional mode that turns a device ON/OFF based on a trigger condition. Events work on “If This, Then That” rules. When the condition for the rule is satisfied, the event activates.
Events can be used to keep any parameter within a certain range, or trigger an action based on one value.

Note: Events take priority over all other modes (except scenarios), due to their trigger-based nature. Events are often set for thermostat controls (such as temperature, or humidity), or emergency situations. These may overtake other device modes.
Toggling Modes:
Please read this section carefully, as the information here is very important for normal operation of your Felix Smart controller:
Once in a while, you may need to temporarily turn a device ON/OFF, even if the device is currently running on a Cycle, or Timer. This can be done simply by tapping the toggle button for that device. In order to get the device back to its normal Cycle/Timer operation, you must tap the toggle button again.

Hitting the toggle button for a device while a Cycle, or Timer is active, will “pause” the set Cycle/Timer, until you manually toggle it again. Please refer to the diagram below which shows how the device toggle feature works:

d. Setting up a Cycle
Setting up a Cycle requires inputting several settings based on your desired outcome. Cycles work in a specific way, and must be set up properly to achieve automation goals.
How it works:
The “Total Duration” defines how long each event in the Cycle lasts. You can set this duration with number of hours, minutes and/or seconds.

A Cycle has a start and end time, which is the defined time period in which your device will "cycle” based on its settings. Beyond this time frame, a Cycle will be inactive.

Your Cycle contains a “number of events” setting. Events are the number of times the device will turn on during the Cycle period. The number of events possible for selection are calculated based on your Cycle Duration and your Cycle's start/end times.

The "Cycle Calendar" section is optional and contains settings that allow you to further customize a Cycle. The "Cycle Start Date" defines when the Cycle will officially activate (in case a future start date is desired) and the "Set Cycle to repeat every" setting allows you to stagger your cycle days, such that the cycle is not active every day. For example, setting the cycle to repeat every 1 day means that the program will activate your cycle on the first day, skip the next day, then activate again on the third day, and so on. Setting the cycle to repeat every 2 days means the program will activate on the first day, skip 2 days, then activate again on the 4th day.

The "Active Cycle" button turns your cycle ON/OFF. To keep your cycle running, ensure that it’s set to the ON position and hit Save.


e. Setting up Timers
Setting up a timer only requires you to input a ‘Start Time’ and ‘End Time’.
Note: You can set up multiple Timers for a single device, so long as none of the Timers overlap.
How it works:
On the “Timers” tab in a device's settings, tap on the green ( + ) button to create a new Timer.

On this screen, you can name your Timer, add a “Start Time” and “End Time," and select what days of the week you would like your Timer to be active on. Your device will turn on at the "Start Time" and turn off at the "End Time." Once you’ve set your desired time range, hit “Save” to create the Timer.

The "Active Timers" toggle button turns all your Timers ON/OFF, though each individual Timer also has a toggle button. To keep your Timers active, ensure that both the individual timer's toggle button and the "Active Timers" toggle button, are set to the ON position. Then, hit "Save."


f. Setting up Events
Setting up Events for your devices is relatively easy, once you understand how Events work. There are two types of events: a Thermostat Event, and a Regular Event. The following guide will help you set-up each type of event.
How it works:
Events are based on an “If This, Then That” system, where the event is triggered based on a sensor value, using conditional logic. The basic structure is as follows:
Regular Event Overview Example: Sensor Value reaches set point > Event is Triggered > Device turns ON/OFF
Thermostat Event Overview Example: Sensor Value reaches set point > Event is Triggered > Device turns ON/OFF, until Second Sensor Value set point is reached.
Regular Events act like failsafes, ensuring that your ecosystem doesn't fall far from a specified sensor value.
Thermostat Events are everyday automation tools that keep your ecosystem within specified sensor value boundaries.
The difference between the two types of Events lies in the "Tolerance" feature. Any Event with a Tolerance of 0 is a Regular Event, whereas any Event with a 0< Tolerance is a Thermostat Event.
Note: You can set up multiple Events for a single device, but please do this carefully. It’s generally not a good idea to pair up more than one sensor's reading against a single device. For example: You can setup Events for a heater, where the trigger for the heater is temperature. But you should not set up the same heater to trigger from pH, or another temperature sensor. A 1:1 (sensor:device) pairing for trigger Events is generally the maximum we recommend, however it is totally okay to setup multiple events with the same sensor/device combo, as long as the logic is simple.
On the “Events” tab in a device's settings, tap on the green ( + ) button to create a new Event.


At the top of this screen, you can name your Event. Naming your Event is a required step.


The “When” section defines what parameter specifically triggers your device. Here, you can start by selecting any one of your connected probes, or devices, simply by tapping on it.

After you input a sensor, or device into the “When” section, you can select the desired trigger value for your primary device. Define information about this value, starting with a range (greater than, greater or equal, less than, less or equal), then a specific value.
Note: Just like with your primary device, you can toggle a device's condition in the "When" section by tapping on it.


Tolerance is the difference between a Thermostat Event and a Regular Event. If you wish to use your Event as a failsafe, ensure the Tolerance is set to 0.0 and move on. If you wish to use your Event as a thermostat-style control, where it continuously keeps your environment's specified parameter within a set range, then you must use Tolerance to specify your second boundary parameter.
For example, a heater could be set to turn ON when temperature is LESS OR EQUAL to 20°C, with a Tolerance of 2°C. This would keep the temperature range between 20°C and 22°C. The temperature would exceed 22°C, then gradually fall to 20°C before repeating the Event.
Note: Tolerance has minimum values for each sensor, as to prevent your devices from rapidly turning ON/OFF.

Hit “Save” at the top right of the screen, and your Event will be saved.
Once saved, your Event will display a summary of its functionality. Also, ensure that your Event's toggle button is set to ON for it to be active.

Note: Event triggers take priority over other types of device settings, such as Cycles or Timers.
g. Device Settings
You can access a Device's Settings by tapping its gear icon.

From here, you can set your device to Manual mode, create a custom name, select the device type, change its socket location, or remove the device. Selecting your device's type helps you and your controller to recognize devices more quickly. Devices must be categorized with a device type to run Programs.


4. Sensors and Probes
a. Interpreting Probes and Sensors
Your sensors and probes are calibrated to display readings in optimal conditions. Extreme conditions, such as excessive heat or cold and/or high humidity, may affect the accuracy of your reading. Here is a list of the different readings you may see based on the sensors and probes you have in your system.
![]() = Specific Gravity
= Specific Gravity
![]() = Electrical Conductivity
= Electrical Conductivity
![]() = Dielectric Permittivity
= Dielectric Permittivity
![]() = Total Dissolved Solids
= Total Dissolved Solids
![]() = Acidity
= Acidity
![]() = Oxidation Reduction Potential
= Oxidation Reduction Potential
![]() = Ammonia
= Ammonia
![]() = Water Temperature
= Water Temperature
![]() = Air Temperature
= Air Temperature
![]() = Ground Temperature
= Ground Temperature
![]() = Humidity
= Humidity
![]() = In Water
= In Water
b. Setting up a Sensor
The majority of Felix Smart's sensors/probes are plug and play, as well as pre-calibrated. After simply plugging your device into a USB port, you will start seeing readings immediately. These readings don't immediately appear on your dashboard. You will learn how to pin desired readings to your dashboard in the next section.

The Seneye powered monitor requires you to insert a slide into the device and scan the QR code displayed on the slide's packaging. To do this, head into the Seneye device's settings and follow the steps below.

c. Pinning Sensors
You can pin preferred sensor readings on your dashboard. Do this by tapping on the black arrow next to the Sensors section on your dashboard. From here, pin the parameters you would like to see on your dashboard using the toggles on the right.


From here, you can also access your sensor's configuration settings, in order to add a custom sensor name, custom sensor group name, or remove the sensor. To access this screen, tap on the gear icon next to the sensor you would like to make adjustments to.


d. Sensor Alarms & Notifications
Within your Sensor Settings, which can be accessed by tapping a sensor reading on your dashboard, or by tapping a sensor's gear icon in the Sensor pinning screen, you can configure notifications/alarms for yourself, based on sensor readings. Tap the "Alarms" header, then tap “Add Sensor Alarm." Input the range and values, then hit save.


Once an alarm is saved, a summary of its functionality will be displayed with it. Ensure that the alarm's toggle button is set to the ON position if you wish for it to be active. 
e. Sensor History
You can access the historical data of any sensor through the "History" header in Sensor Settings. Tapping the expansion button in the bottom right corner of your 30-day graph affect how your graph appears. From this screen you can download a .CSV file of your sensor's readings, either with a full history, or with average values. You can also tap on any day's value readings to view further specifics.


f. Sensor Trim
If you wish to adjust a sensor's readings for any reason, you can do so utilizing the Trim feature, found in Sensor Settings. Choose whether you wish to add/subtract, then choose a value.


Your updated sensor value will appear in Sensor History and on your dashboard. However, your Trim's amount will be displayed at the bottom of the affected value, so that you do not forget about it. 
If you wish to remove a Trim from a sensor, you can do so by pressing "Reset Trim" at the bottom of the Trim screen in Sensor Settings.
Note: Trim affects the true value of a sensor and will be the new value utilized for all automations based on that sensor's parameter.
g. Light Meter
To access the in-app Light Meter, simply tap on the play button next to it. This Light Meter utilizes values pulled from your phone's front camera to derive accurate light readings.
Note: In order to get accurate results with the Light Meter, you must place a white piece of 80gsm - Standard Copy Paper over your device's front camera while taking measurements. This acts as a diffuser for the light, and we have calibrated our Light Meter to work with this material.


Tap your screen in the Light Meter to lock in light readings. This allows you to measure the spot you would like to, then view the readings on your screen.


a. How to use Notifications
From time to time, you will receive notifications in your application. These notifications will either be ones that you have set up, or alerts directly from Felix Smart's systems. Notifications from Felix Smart may be due to emergency situation detections, or simply a heads up on maintenance that we are performing in our servers. When you have an outstanding notification, the Notification Bell in the top right corner of your dashboard will be filled in and show a red dot. To access your notifications, simply tap on this bell.

You can choose to Save, Delete or Remind yourself of these notifications.To Delete an individual notifcation, you can swipe it to the left. To Delete all of your notifications at once, you can press the "Clear" button in the top right corner of your screen. To set a Reminder, tap the notification you wish to be reminded of, then set when you would like the Reminder notification, and click "Save."


When all of your outstanding notifications have been resolved, your Notification bell will show only an outline, rather than be filled in. 
b. Types of Notifications
There are 3 types of notifications that you will receive.
1. Critical Notifications - KAI has noticed something that might have an adverse affect on your system. This may include power or internet disruptions, excessive heat or moisture, spikes in parameters you are monitoring (when probes or monitors are detected).
2. Alert Notifications - These are notifications that you have set up for yourself.
3. General Notifications - These are notifications about new updates, or scheduled server maintenance.
6. Wi-Fi
a. Wi-Fi Connection Limitations
Felix can only work on a 2.4GHz network. Please be sure that the SSID network that you will be connecting to is a 2.4GHz network. If you have a dual band router or a Wi-Fi 6 router, it's a good idea to make sure that you have a dedicated SSID for your 2.4GHz network. Please follow the instruction in your router settings in order to create a dedicated network.
You will need to be within 5 feet of your Felix when setting up your Wi-Fi. The distance from your Felix to your router should be no more than 30 feet. If the distance to your router is greater than 30 feet, we recommend that your Felix be hardwired to your network using our ethernet dongle or that you purchase a 2.4GHz capable mesh or Wi-Fi extender.
b. How to Clear Wi-Fi Settings & Connect to a New Wi-Fi Network
Note: Make sure you have your SSID password handy and that you've checked that the password is correct. Most Wi-Fi setup issues occur because of an incorrect password.
-
First, access the back of your Felix Smart Controller and find the tiny round button above the power switch.

-
Next, hold down this button and watch the Front LED Light Bar carefully. When the Front LED Light Bar color turns yellow/orange in color, let go of the button. Next, flip the power switch on the controller to turn it off, wait a few seconds, then flip it back on.

-
Wait for your Felix Smart controller to boot up again, this should take 2-4 minutes. Once your controller is fully booted up, the Front LED Light Bar should be solid white, indicating that it is not connected to WiFi, but that it is ready to be connected to WiFi.

-
Open up your Felix Smart application, and tap the menu button at the top left of the dashboard.

-
Next, tap on “Wi-Fi Setup" to access the Wi-Fi setup menu

-
Then tap on “Wi-Fi Setup” at the bottom of the screen and follow the in-app instructions to setup your controller with a Wi-Fi network

Note: Be sure to be as close as you can to your Felix Smart controller during the Wi-Fi setup process.
Note: The most common issue during WiFi setup is inputting the wrong password. If your Wi-Fi setup is unsuccessful, please restart the Felix as instructed above and try again.
7. Settings & Upgrading Firmware
To access your controller's settings/options screen, first tap the menu button at the top left of your dashboard. Then, tap the "Options" button.

a. Controller Serial Number
You can find your Felix Smart controller's serial number in the Options menu of your controller. Your serial number is unique to your Felix Smart controller. Do not share your serial number.

b. Firmware Version and Updates
You can find your Felix Smart controller's current firmware version in the Options menu of your controller. Here, you can also update your firmware version. Please be sure to always update to the latest firmware version when available. Once you tap on the update button, your Front LED Light Bar will turn purple and the upgrade will begin.
Note: It is very important that you do not turn off your controller or interrupt the update in any way. Any disruption may cause your controller irreparable harm.


c. Front LED Light Bar Settings
You may want to turn your light bar OFF/ON from time to time. You can do this in your controller's Options menu. Please be careful with this function, as the light bar is critical for your controller's communication with you.
Tap on the controller in the Options menu once to turn ON/OFF your Front LED Light Bar completely.


You can also set a schedule for your Front LED Light Bar to be ON/OFF. To access these settings, tap on the controller in your Options screen twice. 

d. Renaming a Felix Smart Controller
You can rename your controller in the Options menu. Tap on your existing name to display your keyboard. Then, tap "Save" in the top right corner when finished.

e. Deleting or Removing a Felix Smart Controller
You may want to remove a Felix Smart controller from your account if you decide to sell your controller. Do not perform this function unless you are certain that you want to remove it from your account, as it will delete all automation settings associated with it. You can perform this function in the Options menu. Scroll to the bottom of the page, confirm your deletion by tapping the checkbox, then tap "Delete controller."


8. Troubleshooting Guide
There may be times when your controller behaves abnormally. Fortunately, many symptoms can be solved through simple techniques.
a. How to Reboot/Power Cycle Your Controller
You can restart/power cycle your Felix Smart controller by flipping the power switch toggle OFF for 3 seconds, then back ON. Your Front LED Light Bar should oscillate once everything is running properly. This normally takes up to 3 minutes.

b. Wi-Fi Connectivity Issues
The best fixes for Wi-Fi connection issues, including delays between application inputs and controller responses, involve rebooting relevant devices.
Firstly, attempt to power cycle your controller.
Secondly, attempt to power cycle your router.
Thirdly, attempt to power cycle your controller and router at the same time.
If connection issues persist, contact support by sending an email to felix@felixsmart.com.
9. Deleting Your Account
If you wish to delete your Felix Smart account entirely, you can follow this quick guide. If your account is deleted, any collected relevant personal data will be deleted along with it.
To delete your Felix Smart account, first tap the menu button at the top left of your dashboard. Then, tap the "Edit profile" button.


